What belt grinder should a (beginner) knife maker own?
Starting knife making is exciting, but choosing the right grinder is overwhelming. The wrong one ruins projects and wastes money. This guide simplifies picking the perfect beginner belt grinder.
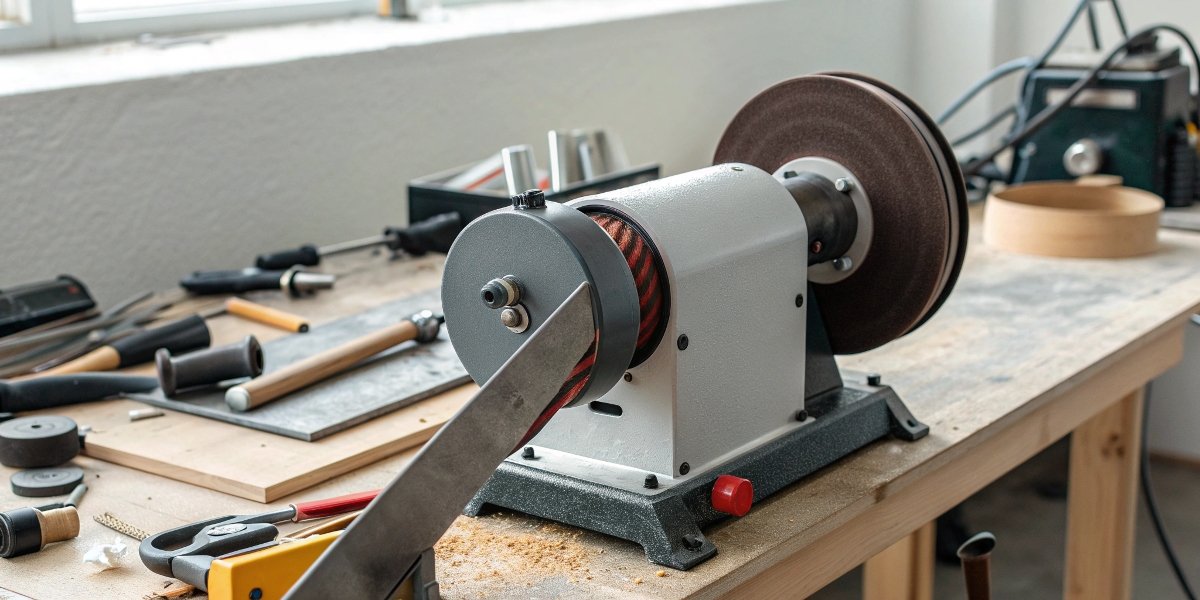
For beginners, a 1×30" or 2×42" belt grinder is an ideal starting point. These sizes offer a great balance of power, control, and affordability. The most crucial feature is variable speed control, which allows for precise work without overheating and ruining the blade’s temper.

Getting the right machine is the most important first step you will take. It sets the foundation for all your future projects. Now, let’s break down the details so you can make a confident choice. We will explore the specific features that separate a good starting grinder from a professional one.
What size belt grinder for knife making?
You see grinders in all sizes, like 1×30", 2×42", and 2×72". Picking the wrong one can limit your projects or be too much to handle. Let’s look at the best sizes for starting out.
For most beginners, the best sizes are 1×30" and 2×42". The 1×30" is excellent for smaller knives, intricate details, and sharpening. The 2×42" provides more power and a larger work surface, making it versatile for a wider range of knife sizes.

When we talk about grinder sizes1 like "1×30", the first number is the belt width in inches, and the second is the belt length. This size directly impacts your work. A wider belt makes it easier to get flat, consistent grinds on a blade. A longer belt lasts longer and runs cooler because it has more surface area to dissipate heat. In my nearly three decades of experience, I’ve seen many beginners succeed by starting with a manageable size.
Why Size Matters
For a beginner, control is more important than raw power or speed. A smaller machine is less intimidating and allows you to learn the fundamentals of grinding.
- 1×30" Grinders: These are very popular starting points. They are affordable and don’t take up much space in a small garage or workshop. Belts are cheap and widely available. They are perfect for learning to shape handles and practice basic bevels on smaller knives. Their main downside is a less powerful motor and smaller contact area.
- 2×42" Grinders: This is a fantastic middle ground. It offers more stability and power than a 1×30". The 2-inch wide platen is a significant advantage for creating clean, flat bevels. My insights point to a combo 2×42" unit with a 1/3 HP motor2 as a great choice. The slower speed is actually a benefit, preventing you from accidentally ruining the blade’s heat treatment.
| Grinder Size | Best For | Pros | Cons |
|---|---|---|---|
| 1×30" | Small knives, detail work, sharpening | Affordable, compact, cheap belts | Less power, belts wear faster, smaller work |
| 2×42" | Medium knives, learning bevels | Good power, versatile, stable | More expensive, larger footprint |
| 2×72" | Professional, large-scale production | Very powerful, fast, endless belts | Expensive, overkill for beginners, large |
What kind of sanding belts for knife making?
You finally bought the grinder, but now you need the belts. Using the wrong belt material will give you poor results, wear out quickly, and waste your money. Let’s discuss the main types.
You will mainly use three types of belts: ceramic, zirconia, and aluminum oxide. Ceramic is for aggressive steel removal. Zirconia is a great all-around choice for shaping. Aluminum oxide is perfect for finishing, sharpening, and working on handle materials like wood.

The abrasive grain on the belt does all the work, and different materials are designed for different jobs. Having a small selection of each type is much better than having a large stack of the wrong kind. Think of it like having different knives in your kitchen; you wouldn’t use a bread knife to peel a potato. At our factory, we produce belts with all types of grains because we know professional results require the right tool for each specific step of the process.
Choosing Your Abrasive Material
Let’s break down the common materials and where they shine. Understanding this is key to efficient and cost-effective grinding.
- Ceramic: This is a high-performance abrasive. It uses a friable grain, which means as it wears, it fractures and exposes new, sharp edges. This "self-sharpening" action makes it amazing for hogging off hardened steel quickly when you are shaping your bevels. It costs more, but it cuts faster and lasts longer on steel.
- Zirconia Alumina: This is your workhorse belt. It’s tougher than aluminum oxide and is a great middle-of-the-road option for general shaping of both metal and wood. It provides a good balance between cost and performance.
- Aluminum Oxide: This is the most common and affordable abrasive. It works very well on wood, plastic, and soft metals. For knife steel, it’s best reserved for the final stages like light finishing or sharpening. It dulls more quickly on hard steel compared to ceramic or zirconia.
- Silicon Carbide: I also recommend buying some silicon carbide belts3. They are very durable and excellent for non-ferrous metals (like brass guards), composites, and for fine finishing on hardened steel.
| Abrasive Material | Primary Use in Knife Making | Key Feature |
|---|---|---|
| Ceramic | Heavy steel removal, shaping | Self-sharpening, long-lasting |
| Zirconia | General purpose grinding, shaping | Durable, good value |
| Aluminum Oxide | Handle materials, sharpening | Affordable, great for wood |
| Silicon Carbide | Fine finishing, non-ferrous metals | Very durable, sharp grain |
What belt to use for knife making?
You understand the belt materials, but what about the grit number? Starting with a grit that’s too high wastes time, but starting too low can gouge your blade. Here is a simple guide to grit.
Start with a low grit (like 36 to 80) for rough shaping. Then, move to medium grits (120 to 220) to refine the shape and remove scratches. Finally, use fine grits (400 and higher) for finishing, sharpening, and handle work.

The number on the back of the belt indicates the grit size. A small number means large, coarse abrasive particles, which remove material quickly. A large number means small, fine particles, which remove material slowly and leave a smoother finish. The goal is to use each grit to remove the scratches left by the previous, coarser grit. This step-by-step process is fundamental. Don’t skip grits, or you will spend forever trying to get a clean finish.
Understanding Grit Progression
Working through the grits properly is the secret to a professional-looking knife. You cannot jump from an 80-grit belt to a 400-grit belt and expect a good result.
- Step 1: Rough Grinding (Low Grits: 36, 60, 80): The goal here is speed and efficiency. You are removing a lot of steel to define the knife’s profile and establish the main bevels. I always use a high-quality ceramic belt for this stage because it cuts cool and fast, saving me time and effort.
- Step 2: Refining the Grind (Medium Grits: 120, 180, 220): After the rough shape is set, you switch to medium grits. Your job now is to smooth out the surface and clean up the grind lines. You are refining the shape, not drastically changing it. Zirconia or fresh aluminum oxide belts4 are great here.
- Step 3: Finishing (High Grits: 400, 600, 800+): These grits are for creating the final surface finish. They remove very little material. This stage is used to create a satin finish on the blade before sharpening or to put the final touches on a wooden handle.
| Grit Range | Stage | Purpose |
|---|---|---|
| 36 – 80 | Rough | Fast material removal, shaping profile |
| 120 – 220 | Refining | Removing deep scratches, smoothing |
| 400+ | Finishing | Creating final satin finish, sharpening |
How much horsepower does a 2×72 belt grinder need?
You’re looking at grinders and see different horsepower ratings. An underpowered motor will stall and frustrate you, while an overpowered one is expensive overkill for a beginner. Let’s clarify the power you need.
A beginner needs a motor between 1/3 and 1 horsepower (HP). This provides enough power for most knife-making tasks without being dangerously aggressive. Variable speed control is far more important than raw horsepower because it gives you the control needed to do detailed work.

Horsepower is a measure of the motor’s ability to do work. A higher HP motor can remove material faster and is less likely to slow down or stall when you press the steel against the belt. However, for a beginner, too much power can be a problem. It can remove material so fast that a small mistake can instantly ruin your workpiece. That’s why I often recommend starting with a less powerful, more controllable machine.
Finding the Right Power Balance
You want a motor that won’t bog down but also won’t get you into trouble. My insights are clear: avoid machines with more than 2 HP when you are starting.
- Under 1 HP (1/3, 1/2, 3/4 HP): This is the ideal range for a beginner. A 1/3 HP motor on a 2×42" grinder is perfect. It is forgiving and less likely to overheat the blade. A 1/2 to 3/4 HP motor on a 1×30" or 2×42" grinder with variable speed gives you excellent control for both shaping steel and doing delicate handle work. This is enough power for almost any knife you want to make as a hobbyist.
- 1 to 1.5 HP: This is the sweet spot for many serious hobbyists and is often found on entry-level 2×72" grinders. It offers a noticeable boost in power for faster grinding but is still very controllable, especially when paired with a variable speed drive.
- 2 HP and Above: This level of power is for professional shops and production work. These motors are designed to run all day under heavy load. For a beginner, a 2 HP grinder is not only unnecessary but can also be unsafe. It removes material incredibly fast, leaving no room for error. Stick with lower power until you have developed your skills.
Conclusion
Start with a 1×30" or 2×42" grinder with variable speed. Get a variety of ceramic, zirconia, and aluminum oxide belts, and learn to progress through the grits.
-
Understand the various grinder sizes and their specific uses to choose the right one for your projects. ↩
-
Discover why a 1/3 HP motor is ideal for beginners, providing control without overheating. ↩
-
Find out how silicon carbide belts excel in fine finishing and working with non-ferrous metals. ↩
-
Understand the best applications for aluminum oxide belts, especially in finishing and sharpening. ↩
Written by

leeon
You may also be interested in:
What is an angle grinder?
Are you confused by this powerful, versatile tool? You see it everywhere but are not sure what it does or if you need one. Getting
What is a buffing wheel used for?
Dull, scratched surfaces can ruin your products. This costs time and money. A buffing wheel is your tool to restore that perfect, professional finish everyone
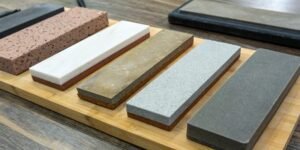
What is the best type of sharpening stone for kitchen knives?
Your kitchen knives are getting dull, making simple tasks like slicing a tomato a frustrating chore. A dull knife is a dangerous knife, but choosing
What is a good sharpening stone for my knives?
A dull knife is frustrating and can be unsafe. But with so many sharpening stones available, choosing the right one feels overwhelming. I will help

How do you cut welds with a grinder?
You have a rough weld that needs removing, but you’re worried about damaging the metal or getting hurt. Using an angle grinder correctly is the

Can I put a circular saw blade on a grinder?
You need to make a quick cut, and your angle grinder is right there. It’s tempting to try and fit a saw blade on it.