
Are tiny cracks appearing on your ground surfaces? This problem leads to part failure, wasting time and money. You can solve it by understanding the root causes.
Grinding cracks are small fractures caused by excessive heat and stress during the grinding process. To prevent them, you must optimize the heat treatment of your workpiece, adjust grinding parameters like feed rate and wheel speed, and ensure sufficient cooling. The material you choose also plays a key role.

I’ve been in the grinding business for nearly 30 years here in Henan, the heart of China’s abrasives industry. We’ve seen it all. Grinding cracks1 are one of the most common and costly issues our customers face. They often appear after the part has passed inspection, leading to failure in the field. But they are almost always preventable. The key is to stop thinking of grinding as just a finishing step. You have to see it as a complete process, where what happens before grinding is just as important as the grinding itself. Let’s explore how you can eliminate these cracks for good.
What causes grinding cracks in metal surfaces and how can they be prevented?
Do your parts crack after grinding, even with careful work? This happens when hidden stresses in the material are released. Luckily, you can prevent this with the right preparation.
Cracks are mainly caused by three things: improper heat treatment, wrong grinding parameters, and unsuitable material properties. Prevention involves fixing these issues: ensure full tempering after hardening, use lower feed rates and sharp wheels, and select materials that are less brittle.

In our factory, we think of crack prevention as a three-part strategy. You have to look at the workpiece’s history, the grinding process, and the material itself. If you only focus on one area, you’ll still have problems.
Optimizing Heat Treatment
This is the most common cause we see. If the heat treatment isn’t right, the material is already weak before it even touches the grinding wheel.
- Problem: After quenching2 (hardening), parts must be tempered to relieve stress. If you wait too long (more than 3 hours), or if the tempering3 is insufficient, the material remains very brittle and is extremely prone to cracking. Another issue is uneven hardening, which leaves different levels of stress across the part.
- Solution: Always temper parts immediately after quenching. For materials that are known to crack easily, try a low-temperature temper around 150°C. Sometimes, a second tempering cycle is needed to make the part stable.
Choosing the Right Material
Some materials are just more difficult to grind than others.
- Problem: High-carbon steels, like tool steels, are very hard but also very brittle. This makes them highly susceptible to cracking from the thermal shock of grinding.
- Solution: If the application allows, consider using a tougher steel. For parts that need good hardness and appearance but don’t require extreme edge retention, steels like 1Cr13 or 16Mn are much more forgiving during the grinding process.
How do grinding parameters influence crack formation during machining?
Are you following the manual but still getting cracks? Your grinding parameters might be technically correct but wrong for your specific job. This mismatch creates intense, damaging stress.
Grinding parameters directly control heat and stress. An aggressive feed rate, the wrong wheel speed, or a dull grinding wheel all generate excessive heat. This leads to thermal shock and cracking. Careful adjustment is crucial for a crack-free finish.

I remember a client who made high-precision gears. They were experiencing random cracking on their hardened steel parts. They blamed our grinding wheels, but we suspected something else. I asked them to send me their process sheet. Their parameters seemed fine on paper, but I noticed their single-pass feed rate4 was a bit high for that specific material. They were trying to save cycle time. We advised them to split the process into a roughing and a finishing pass. This small change completely eliminated the cracking. The lesson is that your parameters must match your material and your goal.
Key Grinding Parameters and Their Impact
| Parameter | Bad Practice (Causes Cracks) | Good Practice (Prevents Cracks) |
|---|---|---|
| Feed Rate / Depth of Cut | Too high. Taking off too much material at once generates massive heat. | Use a small depth of cut. For roughing, stay under 0.03 mm per pass. For finishing, go even smaller. |
| Grinding Wheel Condition | Dull or loaded wheel. A dull wheel doesn’t cut; it rubs and smears, creating friction and heat. | Dress the wheel regularly to keep it sharp and clean. A sharp wheel cuts freely with less heat. |
| Wheel Selection | A wheel that is too fine or too hard for the job. It acts like a dull wheel, increasing heat. | Use a coarser grain or a softer bond wheel for roughing. This allows the wheel to break down and expose new, sharp grains. |
Ultimately, the goal is to reduce the amount of heat generated at the point of contact. If you treat the grinding wheel like a cutting tool with thousands of tiny sharp edges, you will focus on keeping those edges sharp and not forcing them through the material. This mindset shift is critical.
What are effective methods for detecting and repairing grinding-induced cracks?
Are you worried that invisible cracks are hiding in your finished parts? These defects can cause catastrophic failures later on. You need reliable ways to find and deal with them.
Effective detection methods include visual inspection under magnification, magnetic particle testing (MPT), and liquid penetrant testing (LPT). Unfortunately, repairing these cracks is often not viable for precision parts. The best strategy is to scrap the part and focus on prevention.

Finding cracks is one thing, but fixing them is another story. In our experience, for high-performance components, a repaired crack is a point of future failure. The structural integrity is already compromised. Attempting to grind away the crack or weld it is usually not a good idea, as it can introduce even more stress into the part. The focus must be on detection and then prevention.
Common Detection Methods
-
Visual Inspection: This is the first step. Use a strong light and magnification. Sometimes, a light acid etch can make very fine cracks more visible. This is the simplest method but also the least reliable, as it only finds surface-level cracks.
-
Liquid Penetrant Testing (LPT): This is a great method for non-magnetic materials.
- A colored or fluorescent dye is applied to the surface.
- The dye seeps into any surface-breaking cracks via capillary action.
- The excess dye is wiped off, and a developer is applied.
- The developer draws the dye out of the cracks, making them clearly visible.
-
Magnetic Particle Testing (MPT): This is the go-to method for ferromagnetic materials like most steels.
- The part is magnetized.
- Fine iron particles are sprinkled over the surface.
- If there is a crack, it disrupts the magnetic field, creating a "flux leakage field."
- This leakage field attracts the iron particles, creating a clear visual indication of the crack’s location and size.
The hard truth is that if you find a grinding crack, the part is likely scrap. That’s why every other section in this article is so important. Prevention is the only real "repair" for grinding cracks.
Why do thermal stresses during grinding lead to crack generation and how can this be minimized?
Ever wonder why a part looks perfect but then cracks overnight? The culprit is hidden thermal stress built up during grinding. This invisible force can ruin your best work.
Grinding creates a tiny, super-hot zone. The metal expands and then is rapidly cooled by the coolant. This rapid change creates immense pulling forces (tensile stress) on the surface. If these forces are stronger than the metal, it cracks. Minimizing this requires reducing heat and ensuring consistent cooling.

Think of it like this: you heat a small spot on the metal surface to an extremely high temperature, maybe over 1000°C, in a fraction of a second. This spot wants to expand, but the cool metal around it holds it in place. Then, just as quickly, the grinding coolant hits this hot spot and quenches it. This rapid cooling causes the spot to shrink violently. This expansion and contraction creates a tug-of-war on the surface. The pulling force is called tensile stress. If the material was already brittle from poor heat treatment5, this stress is more than enough to pull it apart and form a crack.
How to Minimize Thermal Stress
Your main goal is to manage heat. You either reduce the amount of heat you generate, or you get better at removing it.
- Improve Cooling: Don’t just pour coolant over the part. You need high pressure and high flow, aimed directly at the point of contact between the wheel and the workpiece. This ensures the heat is carried away instantly and prevents the surface from overheating. Also, keep your coolant clean. Dirty coolant is less effective and can clog the pores of your grinding wheel.
- Reduce Heat Generation: This goes back to our discussion on parameters. A sharp, clean, and properly selected wheel cuts more and rubs less. A slower federate generates less friction. Using a softer wheel bond allows new, sharp abrasive grains to be exposed as the wheel wears, which keeps the cutting action efficient and cool. For us at Reliable, providing the right wheel for the job—whether it’s one of our diamond wheels or a conventional abrasive—is the first step we take to help our clients manage thermal stress6.
Conclusion
Control heat, optimize your process, and select the right materials to prevent grinding cracks. This ensures higher quality parts, less scrap, and saves you money in the long run.
-
Understanding grinding cracks is crucial for improving part quality and reducing costs. ↩
-
Quenching is a critical step that can influence the likelihood of grinding cracks. ↩
-
Tempering is essential for relieving stress and preventing brittleness in materials. ↩
-
Adjusting feed rate can help control heat generation and reduce cracking. ↩
-
Learn how proper heat treatment can prevent costly grinding cracks in your parts. ↩
-
Understanding thermal stress is vital for preventing cracks in machined parts. ↩
Written by

leeon
You may also be interested in:
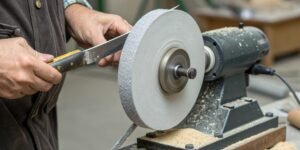
How to use a hard felt bench grinding wheel on knives?
Getting a razor-sharp, polished edge on a knife can be frustrating and slow. A dull knife is dangerous, and using the wrong tool can easily
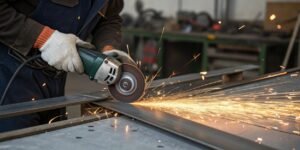
What does an angle grinder do that other tools can't?
Struggling with tools for multiple tasks? Carrying a heavy toolbox is inefficient. An angle grinder replaces many tools, saving you time and effort on the

How to reduce the cycle time in a grinding machine?
Is your grinding process a major bottleneck? Slow cycle times hurt your bottom line and delay deliveries. You can speed up production by optimizing key

Do you regularly sharpen your chisels? If so, how?
A dull chisel ruins wood and causes frustration. This wastes time and expensive materials. Learning to sharpen correctly is the simple, game-changing solution you need
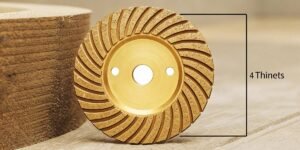
How is a grinding wheel specified?
Confused by the codes on a grinding wheel? Making the wrong choice costs money and ruins parts. Let me show you how to read them
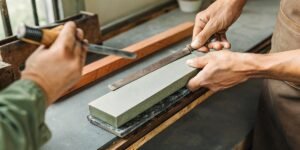
How to sharpen wood chisels by hand?
Dull chisels tear wood, ruin projects, and waste your time. Learning to sharpen them by hand restores their precision, making your work effortless and enjoyable