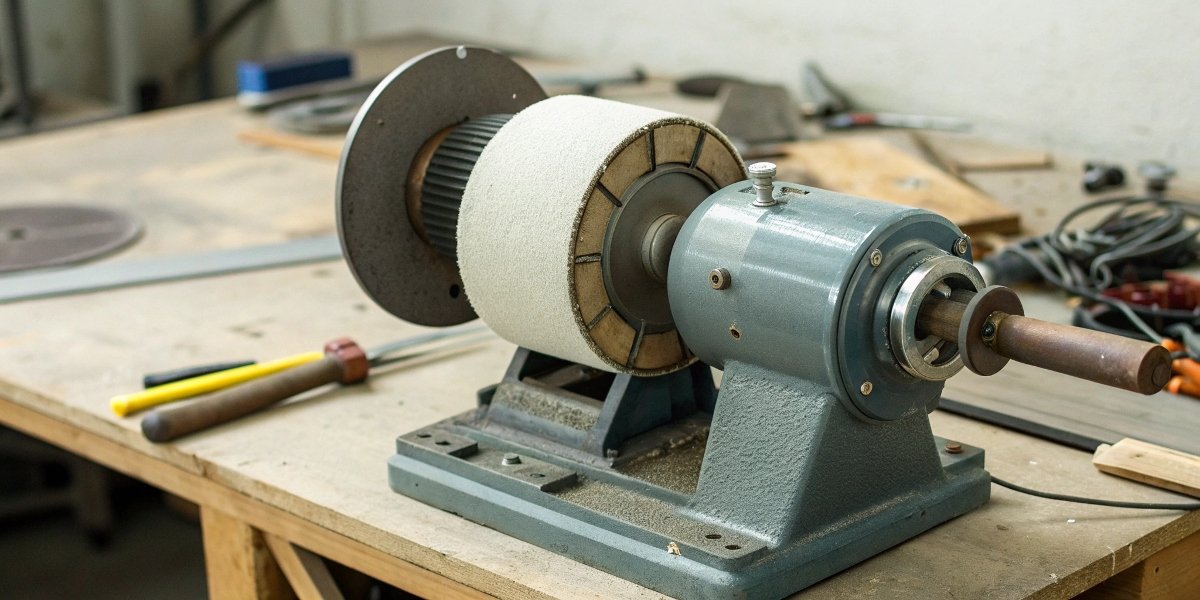
The rotor in my reluctance motored bench grinder won't spin?
Your bench grinder is humming, but the wheel isn’t moving. This frustrating problem can stop your work dead. It’s a common issue, and the fix is often simple.
A non-spinning rotor on a bench grinder is typically caused by a bad start capacitor, power supply problems, or a mechanical jam. Check the power cord and reset buttons first, then inspect the capacitor for damage before looking at the motor itself.

It’s a moment every workshop owner dreads. You flip the switch, hear a buzz, but see no action. Your first thought might be that the motor is dead, signaling a costly replacement. But don’t worry just yet. After nearly three decades of manufacturing grinding tools and their components here in Henan, I’ve seen this issue countless times. The problem is usually less severe than you think. Let’s walk through the troubleshooting process together, starting with the simplest checks and moving to the more complex ones. We will get your grinder spinning again.
Why is my grinder not rotating?
You hit the power switch, but your grinder stays silent. Is it a minor hiccup or a major failure? This uncertainty can be stressful, especially when a job depends on it.
If your grinder is completely dead with no sound, the issue is almost always power-related. Check the outlet, the power cord, and the grinder’s own switch. These are the most common points of failure and are the easiest to fix.

When a machine doesn’t start, we have to think like a detective. We need to follow the path of electricity from the wall to the motor. Over the years, I’ve helped many clients diagnose this exact problem over the phone. More often than not, it’s something simple. Before you start taking the grinder apart, let’s look at the most likely suspects. This systematic approach saves time and prevents you from making the problem worse. Based on my experience, the problem lies in one of three areas: the power source, the motor’s starting components, or a mechanical blockage1.
Breaking Down the "No Spin" Problem
Let’s start with the basics and work our way in.
- Power Supply & Circuitry: This is your first checkpoint. Is the outlet working? Plug another tool in to confirm. Next, examine the grinder’s power cord from the plug to the machine. Look for any cuts, frays, or damage. A damaged cord is both a fire hazard and a common reason for power failure. Finally, the switch itself can wear out from dust and repeated use.
- Start Capacitor: A single-phase motor, like those in most bench grinder2s, uses a capacitor to give the motor the initial "kick" to start spinning. If you hear a hum but the wheel doesn’t turn, a failed capacitor is the most likely cause. Look for a cylindrical component on the motor housing3. If it’s bulging, leaking fluid, or looks burnt, it needs to be replaced.
- Motor or Mechanical Jam: If the power and capacitor are good, the motor itself could be the issue. The bearings might be seized, or debris could be physically jamming the rotor. You can check this with the power off by trying to spin the wheels by hand. They should spin freely with a little momentum. If they are stiff or gritty, you have a mechanical problem.
| Symptom | Possible Cause | First Action to Take |
|---|---|---|
| No sound, no movement | Power issue | Check outlet, cord, and switch. |
| Humming sound, no spin | Faulty start capacitor4 | Visually inspect the capacitor for damage. |
| Grinds/scrapes, no spin | Mechanical jam/bad bearings | Unplug and try to turn wheels by hand. |
What are three conditions that can make a bench grinder unsafe?
A powerful bench grinder is an amazing tool, but it can be dangerous. Ignoring safety risks can lead to serious injury from flying debris or electrical shock. Know the dangers.
Three of the most critical safety hazards for a bench grinder are a cracked wheel, missing or poorly adjusted guards and tool rests, and using the machine with damaged electrical wiring. Always inspect these three things before starting work.

In our factory, safety is not just a rule; it’s our culture. We produce millions of grinding wheels, and each one is built to be as safe as possible. However, once a wheel leaves our facility, its safety depends on proper use and maintenance. A bench grinder spins a wheel at thousands of RPM. The force it generates is immense. If that wheel is compromised, it can disintegrate, sending shrapnel across your workshop at high speed. This isn’t an exaggeration; I’ve seen the aftermath. Understanding the biggest risks is the first step in preventing an accident. Let’s cover the three most important safety checks you must never skip.
The Critical Safety Checklist
Before you even think about turning the power on, make these three checks a habit.
- Grinding Wheel Integrity: A wheel can be damaged by being dropped or by over-tightening the mounting nut. Always perform a quick visual check for any visible cracks, chips, or large gouges. An invisible crack can be just as dangerous. This is why the "ring test5," which we’ll discuss next, is so important for new wheels. A damaged wheel is a ticking time bomb.
- Guards and Tool Rests: These are not optional accessories. The eye shields and wheel guards must always be in place to protect you from sparks and debris. The tool rest is equally important. It supports the workpiece and must be adjusted very close to the grinding wheel—typically about 1/8 inch (or 3mm). A larger gap can cause the workpiece to be pulled into the machine, potentially jamming the wheel or injuring your hand.
- Electrical Safety: As we discussed earlier, a frayed or damaged power cord is a major hazard. It can cause a short circuit that damages the tool or, far worse, cause a severe electrical shock. Never operate a grinder in wet conditions, and ensure it is plugged into a properly grounded outlet.
| Hazard | What to Check | Why It’s Dangerous |
|---|---|---|
| Damaged Wheel | Visual cracks, chips. Perform ring test. | Wheel can shatter under force, causing severe injury. |
| Improper Guards | Eye shields, guards, tool rest position. | Lack of protection from sparks; workpiece can get jammed. |
| Faulty Electrics | Damaged cord, improper grounding. | Risk of electric shock and fire. |
How would you check the condition of a wheel on a bench grinder?
You wouldn’t drive a car on a damaged tire, right? Using a questionable grinding wheel is even riskier. A quick check can prevent a catastrophic failure and keep you safe.
To check a grinding wheel, first, visually inspect it for obvious cracks or damage. Then, perform a "ring test" by tapping it with a plastic screwdriver handle. A good wheel makes a clear ringing sound; a cracked one sounds dull.

The "ring test" is one of the oldest and most reliable quality control methods in our industry. It’s a simple acoustic test that we still use in our Henan factory to check the structural integrity of our wheels before they are packaged. The science is simple: a solid, uniform object will vibrate at a clear, high frequency when struck. A crack or internal flaw disrupts this vibration, producing a dead, low-frequency "thud" instead. It’s a low-tech test that provides high-value information. It tells you instantly if the wheel is sound. Learning this simple skill is essential for anyone who uses a bench grinder.
A Deeper Dive into Wheel Inspection
Let’s break down the complete inspection process. It only takes a minute and should be done every time you install a new wheel.
- Visual Inspection: Look closely at the entire surface and sides of the wheel. You are looking for any visible cracks, chips, or signs of impact. Also, check the paper blotter on each side. These blotters help distribute clamping pressure evenly and must be present. Make sure the arbor hole is not worn or oversized.
- The Ring Test: This is for new or unmounted wheels. Never perform this test on a wheel that is mounted on the grinder. Suspend the wheel on your finger or a small pin through the arbor hole. This allows it to vibrate freely. Take a light, non-metallic object, like the plastic handle of a screwdriver, and gently tap the wheel about 45 degrees from the vertical centerline on each side. A good vitrified or silicate bonded wheel will give a clear, metallic ring. If you hear a dull thud, the wheel is likely cracked and must be destroyed and discarded immediately.
- Check for "Loading": For a wheel already on the grinder, check its surface. If it looks clogged with metal particles, it is "loaded." This reduces its cutting efficiency and can cause overheating. You can refresh the surface using a grinding wheel dresser.
This simple, three-step check ensures the most important part of your grinder is safe and ready for work.
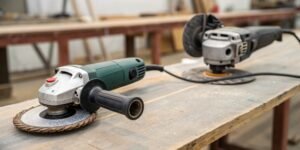
Why is my angle grinder not turning?
Your angle grinder is a mobile workhorse, but a sudden failure can halt your progress. When it stops working, the fix is often different from that of a stationary bench grinder.
If an angle grinder won’t turn, the most common culprit is worn-out carbon brushes. These small blocks transfer power to the motor and are designed to wear down over time. Checking and replacing them is the first step.

While a bench grinder and an angle grinder both use abrasive wheels, their construction is very different. An angle grinder is a handheld, high-RPM tool that sees a lot more abuse. Here at my company, when we provide OEM services for brands that make angle grinders, the main focus is always on durability. The components have to withstand dust, vibration, and impact. Because of this, the most common failure point is a consumable part: the carbon brushes6. These are designed to be the weak link to protect the more expensive motor. Learning how to check them can save you a lot of time and money on repairs.
Troubleshooting Your Angle Grinder
The problems with a handheld grinder are often related to wear and tear from its mobile use.
- Carbon Brushes: This is the number one cause. Carbon brushes are small carbon blocks that press against the motor’s commutator to deliver electricity. As the motor spins, they wear down. Most angle grinders have two small plastic caps on opposite sides of the motor housing. You can unscrew these to access and inspect the brushes. If they are worn down to just a few millimeters, they need to be replaced.
- Switch or Cord: Just like the bench grinder, the switch and cord are common failure points. However, on an angle grinder, the cord flexes constantly and is more prone to internal breaks near the tool’s body. The switch also collects a lot of abrasive dust, which can cause it to fail.
- Gearbox or Spindle Lock: Angle grinders have a set of gears to turn the rotational power 90 degrees. These gears can strip or jam. You might also have an issue with the spindle lock button, which is used to hold the shaft for changing discs. If it gets stuck in the engaged position, the motor will not be able to turn.
| Problem Area | Common Issue | Solution |
|---|---|---|
| Motor | Worn carbon brushes6 | Replace brushes (usually an easy, cheap fix). |
| Power | Faulty switch or damaged cord | Inspect and replace the component. |
| Drivetrain | Jammed spindle lock or broken gears | Disassemble and inspect the head of the grinder. |
Conclusion
Diagnosing a grinder that won’t spin involves simple checks of the power, capacitor, and mechanical parts. Most importantly, always prioritize safety by inspecting your wheels and guards before every single use.
-
Identifying mechanical blockage can prevent further damage to your grinder. ↩
-
Understanding common bench grinder issues can help you troubleshoot effectively and save time. ↩
-
Understanding motor housing can help you maintain your grinder and prevent issues. ↩
-
Knowing how to check the start capacitor can prevent unnecessary repairs and costs. ↩
-
The ring test is a simple method to check the integrity of your grinding wheels. ↩
-
Replacing carbon brushes is a common maintenance task that can extend the life of your grinder. ↩ ↩
Written by

leeon
You may also be interested in:
What's the application of CBN Wheels?
Struggling with grinding hard steels? Frequent wheel changes and poor finishes can hurt your bottom line. We have found that CBN wheels provide the durability
What is the difference between grinding and honing a blade?
A dull blade is a frustrating problem. It slows down production and ruins your workpiece. Using the wrong technique to fix it can cause permanent

How to sharpen a knife on a bench grinder?
Is your dull knife slowing you down? A bench grinder seems like a quick fix, but you’re worried about ruining the blade. You need a
Can you use an angle grinder as a sander?
Your sanding project is tough, and your regular sander is not powerful enough. You look at your angle grinder. It has the power, but is

How to judge the quality of a grinding wheel?
Choosing the wrong wheel wastes money and ruins parts. Poor quality leads to downtime and rejection. A few key checks can guarantee you pick the

What is low stress grinding?
Struggling with parts failing due to hidden stress from grinding? This common issue causes cracks and reduces component life, costing you money. Low stress grinding