Is your dull knife slowing you down? A bench grinder seems like a quick fix, but you’re worried about ruining the blade. You need a sharp edge, not a permanently damaged tool.
Yes, you can sharpen a knife on a bench grinder, but you must be careful. The key is to use a fine-grit wheel, keep the blade cool with water, and maintain a consistent angle. This method is fast for reshaping an edge but requires practice to avoid damaging the blade.

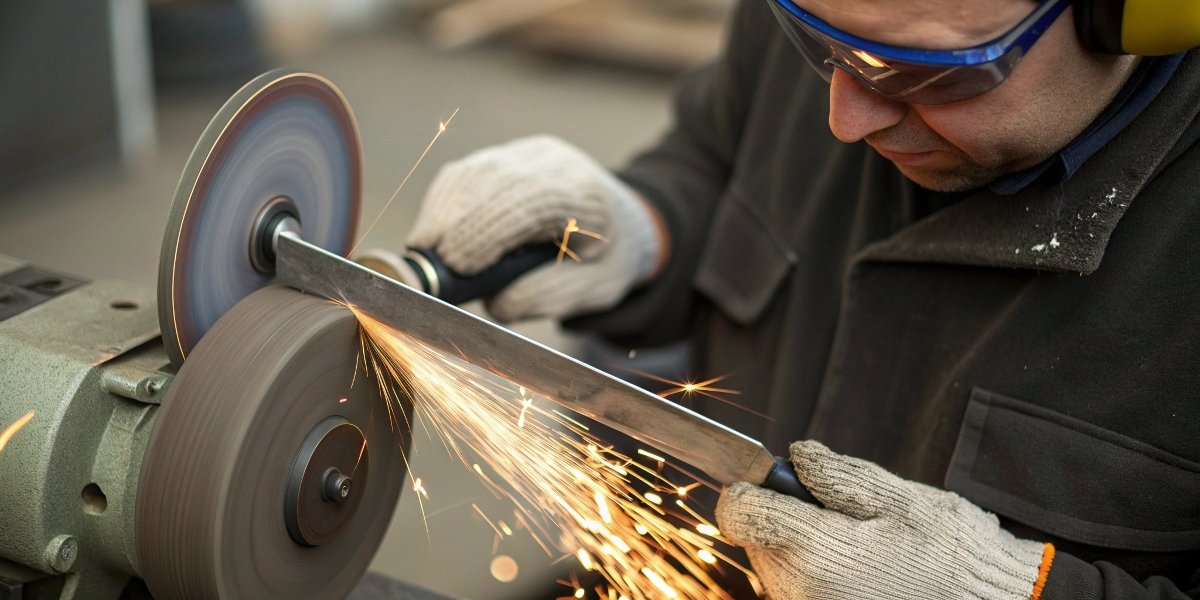
A bench grinder1 can be your best friend or your worst enemy when it comes to sharpening. I’ve seen it go both ways in my nearly thirty years at our factory here in Henan. We use massive industrial grinders to shape tools, but the principles are the same. It’s all about control and using the right tool for the job. Get it right, and you have a razor-sharp edge in minutes. Get it wrong, and you can ruin a good knife by overheating the steel. Let’s walk through how to do it the right way, so you get the results you need without the risk.
Can you sharpen a knife on a bench grinder?
Your powerful bench grinder sits in the shop. You look at your dull utility knife. It feels like the tool for the job, but you hesitate, worried about ruining the blade forever.
Absolutely. A bench grinder is a very effective tool for sharpening. It works best when you need to fix a chipped edge or create a completely new bevel. For simple daily sharpening, it can be too aggressive if you are not careful, removing too much metal quickly.

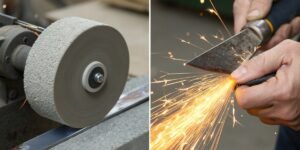
A bench grinder is a tool of power and speed. This makes it perfect for heavy-duty tasks. Think about lawnmower blades, axes, or shop knives that have seen serious damage. The grinder can remove a lot of material quickly to fix chips and reshape a blunt edge. This is its main strength. However, this power is also its biggest risk. For more delicate tools like kitchen knives, a bench grinder can be too much. It generates a lot of heat. Too much heat can "de-temper" the steel. This means it softens the metal, and the edge will not stay sharp. At our factory, we use specific grinding wheels2 for initial shaping, but we always move to finer, slower methods for the final edge. Use a bench grinder for the heavy lifting, not the final polish.
| Sharpening Method | Best For | Skill Level | Risk of Damage |
|---|---|---|---|
| Bench Grinder | Damaged edges, reshaping, thick blades | High | High |
| Whetstone | Fine kitchen knives, precise angles | Medium | Low |
| Electric Sharpener | Quick touch-ups, consistent angles | Low | Medium |
How do I know if my knife is 15 or 20 degrees?
You are ready to get started, but you face a critical choice. What angle should you use? Guessing the angle can make your knife duller than before or create an edge that chips easily.
Most Western kitchen knives use a 20-degree angle per side for durability. Many Japanese knives use a sharper 15-degree angle for precision slicing. To check, use a protractor, an angle guide, or a simple marker trick to see what angle you currently have.

The angle of your knife’s edge determines how it performs. A smaller angle, like 15 degrees, creates a very sharp edge. It is perfect for delicate tasks like slicing fish or vegetables. But this fine edge is also more fragile. A larger angle, like 20 or 22 degrees, creates a stronger, more durable edge. This is better for general-purpose knives that might cut through tougher materials. If you don’t know your knife’s angle, you can use a simple trick. Color the very edge of the blade with a permanent marker. Set your tool rest to an angle you think is correct, say 20 degrees. Then, make one single, light pass on the grinding wheel. Look at the edge. If the marker is gone from only the very tip, your angle is too steep. If it’s gone from the shoulder but not the tip, your angle is too shallow. Adjust until the grinder removes the marker evenly from the whole bevel.
Common Knife Angles
- 15-17 Degrees: Fillet knives, paring knives, many Japanese-style chef knives. Best for precision.
- 18-22 Degrees: Most Western chef knives, pocket knives, utility knives. Good balance of sharpness and durability.
- 25-30 Degrees: Hunting knives, cleavers, axes. Built for heavy use and chopping.
What not to use on a bench grinder?
A bench grinder is a versatile machine, but it has its limits. Using it for the wrong material can be very dangerous. It can damage the grinder, the wheel, and you.
Never use a bench grinder on soft materials like wood, plastic, or aluminum. These materials can clog the wheel, causing it to overheat, come out of balance, and potentially shatter. Also, never grind on the side of a standard grinding wheel; it is not designed for that stress.

Safety is the most important thing in any workshop. In our business, we see how important using tools correctly is. A bench grinder’s wheel is made of abrasive grains bonded together. It’s designed to cut hard metals like steel. When you use it on soft materials, the material melts or smears instead of being cut away. This sticky residue fills the pores of the wheel, a process called "loading." A loaded wheel can’t grind properly. It creates a lot of friction and heat, which is dangerous. The wheel can become unbalanced and vibrate violently. In the worst case, the heat and stress can cause the wheel to crack and fly apart. You should also regularly inspect your wheels. Before mounting a new wheel, tap it gently with the handle of a screwdriver. It should make a clear ringing sound. A dull thud could mean there’s a crack you can’t see. Never use a wheel that doesn’t pass the ring test3. It’s not worth the risk.
How to sharpen blades with a grinder?
You have the right wheel and you know your angle. Now it is time to do the work. The fast-spinning wheel can be intimidating, so you need a clear, safe plan to follow.
To sharpen a blade, first set the grinder’s tool rest to your desired angle. With the grinder on, gently press the blade against the wheel. Move the blade smoothly from its base to its tip in a single motion. Dip the blade in water every few seconds to keep it cool.

I’ve supervised thousands of hours of grinding operations, and the process always comes down to three simple stages: preparation, execution, and finishing. Rushing any of these steps leads to poor results.
Step 1: Preparation is Key
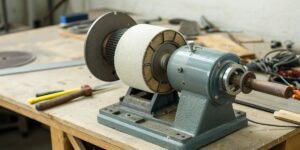
Before you turn the machine on, get everything ready. First, make sure you have the right wheel. For knife sharpening, you want a fine-grit wheel4, something like 100 or 120-grit. A white aluminum oxide wheel5 is a great choice because it runs cooler than a standard gray wheel. Our RL brand wheels are perfectly balanced for smooth work. Next, adjust the tool rest to your angle. Use a protractor to be sure. Most importantly, put on your safety glasses6 and have a small container of water right next to the grinder to cool your blade.
Step 2: The Grinding Process
Turn on the grinder and let it get to full speed. Hold the knife firmly and place the back of the blade on the tool rest. Gently bring the edge into contact with the spinning wheel. Move the blade across the wheel in one smooth, consistent motion, from the heel to the tip. Use light pressure. Let the wheel do the work. After each pass, dip the blade into the water to cool it down. Steel can lose its temper in seconds. Grind one side until you feel a small "burr7" form on the opposite edge. This tells you that you’ve removed enough metal. Then, switch to the other side and do the exact same thing.
Step 3: Finishing the Edge
The grinder creates the basic shape of the edge, but it will be rough. The final step is to refine it. The burr you created must be removed. The best way to do this is with a honing steel8 or a leather strop9. A few passes on each side will remove the burr and polish the edge to razor sharpness. This final step is what separates a decent edge from a great one.
Conclusion
A bench grinder can sharpen knives effectively. Success depends on using a fine-grit wheel, maintaining the correct angle, and keeping the blade cool. With practice, it’s a fast and powerful method.
-
Explore this link to understand the versatility and applications of a bench grinder in various sharpening tasks. ↩
-
Discover the types of grinding wheels best suited for sharpening different types of knives. ↩
-
Find out how the ring test can help ensure the safety and effectiveness of your grinding wheels. ↩
-
Discover the importance of using a fine-grit wheel for achieving a smooth and effective sharpening process. ↩
-
Discover the benefits of using a white aluminum oxide wheel for knife sharpening. ↩
-
Understand the importance of safety gear to protect yourself while sharpening knives. ↩
-
Learn about the significance of a burr and how it indicates effective sharpening. ↩
-
Learn about honing steel and its role in maintaining a sharp knife edge after grinding. ↩
-
Explore the technique of using a leather strop to achieve a polished and sharp knife edge. ↩
Written by

leeon
You may also be interested in:

What's the application of CBN Wheels?
Struggling with grinding hard steels? Frequent wheel changes and poor finishes can hurt your bottom line. We have found that CBN wheels provide the durability
What is the difference between grinding and honing a blade?
A dull blade is a frustrating problem. It slows down production and ruins your workpiece. Using the wrong technique to fix it can cause permanent
Can you use an angle grinder as a sander?
Your sanding project is tough, and your regular sander is not powerful enough. You look at your angle grinder. It has the power, but is

How to judge the quality of a grinding wheel?
Choosing the wrong wheel wastes money and ruins parts. Poor quality leads to downtime and rejection. A few key checks can guarantee you pick the

What is low stress grinding?
Struggling with parts failing due to hidden stress from grinding? This common issue causes cracks and reduces component life, costing you money. Low stress grinding
The rotor in my reluctance motored bench grinder won't spin?
Your bench grinder is humming, but the wheel isn’t moving. This frustrating problem can stop your work dead. It’s a common issue, and the fix