
Your bench grinder wheel is worn, glazed, or chipped. Trying to use it is slow, ineffective, and creates more heat than sparks. This is not just frustrating; it’s a serious safety hazard.
To change a grinding wheel, first unplug the grinder. Then remove the outer guard and spark arrester. Brace one wheel and use a wrench to unscrew the arbor nut—remembering one side has a reverse thread. Swap the wheels, refit the guards, and stand aside for a test run.

This is one of the most fundamental maintenance tasks for any workshop. At my company, Reliable, we manufacture these grinding wheel1s, and their performance depends entirely on proper and safe installation. A wheel that is improperly mounted can be a danger to everyone in the workshop. The process is simple, but every step is important. Skipping even one check can lead to wheel failure. Let’s walk through the correct procedure step by step to ensure it’s done right every time.
How do I change a wheel on a bench grinder?
You need to swap out a worn wheel, but the guards seem complicated and the nut is stuck tight. You’re tempted to force it, but that feels like a good way to break something.
First, disconnect the power. Remove the outer guard, then hold the opposite wheel firm while using a wrench to loosen the arbor nut. Note that the right-side nut has a left-hand (reverse) thread. Remove the old wheel, install the new one, and reassemble.

The process is designed to be straightforward, but it has a few key details that are critical for safety. The most common point of confusion is the nut threading. To prevent the nuts from loosening due to the grinder’s rotation, the nut on the right-hand side (as you face the grinder) always has a left-hand thread2. This means you turn it clockwise to loosen it—the opposite of normal. Forcing it the wrong way will only tighten it further and potentially damage the spindle. Another critical detail is the use of blotters3, which are the paper washers on each side of the wheel. They must be used with the new wheel. They ensure even clamping pressure and prevent the hard steel flanges from cracking the abrasive wheel.
Step-by-Step Bench Grinder Wheel Change
| Step | Action | Critical Reason |
|---|---|---|
| 1. Unplug | Disconnect the grinder from the power source. | Prevents accidental startup, the most serious risk. |
| 2. Remove Guards | Take off the side cover and spark arrester. | Provides access to the arbor nut and wheel. |
| 3. Loosen Nut | Brace one wheel and turn the nut with a wrench. | Right side: Clockwise to loosen. Left side: Counter-clockwise. |
| 4. Swap Wheels | Slide the old wheel off. Slide the new wheel on. | Ensure the new wheel fits the arbor snugly, not loosely. |
| 5. Tighten Nut | Hand-tighten the nut, then give it a final snug with the wrench. | Do not over-tighten, as this can crack the wheel. |
| 6. Reassemble | Re-install all guards and adjust the tool rest. | The guards and rest are essential safety components. |
| 7. Test Run | Stand to the side and let the grinder run for one minute. | Ensures the wheel is balanced and sound before use. |
What is a safe method to fit a new grinding wheel to a bench grinder?
You have the new wheel, but you know that these can shatter if installed incorrectly. Simply swapping the old for the new seems too easy, and you want to avoid a dangerous failure.
The safest method involves three mandatory checks. First, perform a "ring test" to check for hidden cracks. Second, verify the wheel’s max RPM is higher than your grinder’s RPM. Third, ensure it’s mounted with blotters and flanges without over-tightening.

As a manufacturer, safety is our highest priority. A grinding wheel spinning at 3,000 RPM4 contains a huge amount of energy. An invisible crack from shipping or mishandling can cause it to fail catastrophically. The "ring test5" is a simple, old-school method to check for this. Suspend the wheel on your finger or a small pin through its hole and tap it gently with a non-metallic object, like a plastic or wooden screwdriver handle. A good wheel will give off a clear, high-pitched ringing sound. A damaged wheel will produce a dull thud. If you hear a thud, do not use the wheel. The second check, RPM, is non-negotiable. The RPM rating printed on the wheel must be higher than the speed listed on the grinder’s data plate. Finally, never force a wheel onto the spindle, and never tighten the nut with excessive force. A firm "snug" is all that is needed.
Three Pillars of Safe Wheel Fitting
| Safety Pillar | Action | Why It’s Crucial |
|---|---|---|
| 1. Integrity Check | Perform the "ring test" on the new wheel. | Detects invisible internal cracks that can cause the wheel to explode under centrifugal force. |
| 2. Speed Check | Match the wheel RPM to the grinder RPM. | Prevents over-speeding the wheel, which is a primary cause of catastrophic failure. The wheel’s RPM must be higher. |
| 3. Proper Mounting | Use blotters; don’t over-tighten the nut. | Blotters distribute clamping force evenly. Over-tightening can create stress fractures in the wheel. |
Do you need a certificate to change a grinding wheel?
Your coworker mentioned needing a special certificate to change a grinding wheel. This sounds like an exaggeration for such a basic task, and you wonder if it’s really a requirement.
For industrial and commercial workplaces in many countries, like the UK and parts of Europe, formal Abrasive Wheel Training and certification are a legal requirement. For a hobbyist in a home shop, it is not legally mandated but is highly recommended.

This is a very common question we get from our B2B customers, especially those in regions with strong workplace safety laws like the UK’s Provision and Use of Work Equipment Regulations (PUWER). In those environments, the law requires that any employee who mounts, operates, or inspects abrasive wheels must be formally trained and deemed competent. The reason is simple: the potential for severe injury is high. A wheel burst can send shrapnel flying at incredible speeds. Even if you’re a home user and not bound by these laws, the physics of the danger remain the same. The principles taught in these certification courses are universal safety knowledge. They cover wheel selection, handling and storage, the ring test, mounting, guard adjustment, and proper use. Taking such a course, or at least studying the material, is one of the smartest things any user of a grinder can do.
Will a metal grinding wheel work on concrete?
You have a small piece of concrete that needs grinding, and your bench grinder has a standard wheel for steel. It seems powerful enough, so can’t you just use it for a quick job on concrete?
No. A standard metal grinding wheel, made of aluminum oxide, will not work effectively on concrete. The aggregate in the concrete is too hard and will quickly wear down and ruin the wheel, creating heat and dust with very little grinding action.

This is an issue of matching the abrasive material to the workpiece. In our factory, we produce different wheels for different jobs. The gray or white wheels typically found on a bench grinder are made of aluminum oxide6. This abrasive is tough and excellent for grinding high-tensile materials like steel. However, concrete is a completely different challenge. For stone, masonry, and concrete, you need a harder and sharper abrasive: silicon carbide7. Silicon carbide wheels are usually green or black. They are designed to fracture and grind brittle, hard, non-ferrous materials effectively. Using an aluminum oxide wheel on concrete will cause the abrasive grains to dull and flatten almost immediately. The surface of the wheel becomes smooth and "glazed," at which point it stops cutting and just rubs against the concrete, generating excessive heat and presenting a safety risk.
Choosing the Right Bench Grinder Wheel
| Material to Grind | Recommended Abrasive | Common Wheel Color |
|---|---|---|
| Steel and Ferrous Metals | Aluminum Oxide | Gray, White, Pink, Blue |
| Concrete, Stone, Masonry | Silicon Carbide | Green, Black |
| Non-Ferrous Metals (Aluminum, Brass) | Silicon Carbide | Green, Black |
| Tool Steel (Sharpening) | White Aluminum Oxide | White |
Conclusion
Safely changing a grinding wheel is simple: unplug the grinder, check the new wheel with a ring test, match the RPMs, and never over-tighten the nut. Always use the right wheel.
-
Understanding safe practices for grinding wheels can prevent accidents and ensure effective use. ↩
-
Knowing about left-hand threads can prevent mistakes and ensure proper wheel installation. ↩
-
Blotters are crucial for even clamping pressure; knowing their role can enhance your grinding safety. ↩
-
Understanding RPM compatibility can prevent catastrophic wheel failures and enhance your grinding experience. ↩
-
The ring test is essential for detecting cracks; mastering it can significantly improve your safety. ↩
-
Learning about aluminum oxide can help you choose the right wheel for your grinding tasks. ↩
-
Silicon carbide is essential for specific materials; knowing when to use it can improve your grinding results. ↩
Written by

leeon
You may also be interested in:

Can you use an angle grinder without a guard?
You are trying to cut in a tight corner, and the safety guard is getting in the way. Removing it for just one quick cut

What is the difference between “mincing” and “grinding”?
Your team uses "mincing" and "grinding" to describe similar tasks. This confusion in manufacturing terms can lead to ordering the wrong tools, which is a

Can you use a metal grinding wheel on wood?
Tempted to use a metal grinding wheel for a quick job on wood? It seems fast and easy, but this common shortcut can lead to

What are the different types of abrasive cutting tools?
Are you confused by the huge variety of abrasive tools available? Choosing the wrong tool for your material can lead to slow work, poor finishes,

What is the difference between cutting and grinding?
You pick up your angle grinder, a versatile and powerful tool. But in your hand are two wheels that look similar yet serve entirely different
What Must Your Wheel Grinder Be Equipped With for Safe Operation?
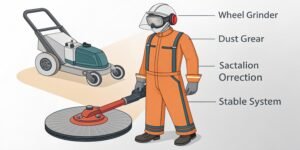
A bench grinder seems simple, but missing key components transforms this basic tool into a high-speed hazard. An improperly adjusted guard or rest can cause